
Make Instagram Story frames
Use For Stories to make vertical frames from a published story. This tool is available with Pro and above plans.
Choose the layout
Section titled “Choose the layout”- Open your story’s share page and select For Stories.
- Choose Auto, Pair, Mosaic, 2 × 2, Story grid, or One per frame.
- Wait for the previews to finish.
- Open a frame to check its crop. Select a photo or video, then drag it or use the arrow keys to adjust the crop.
The Show Instagram Interface preview helps you check where Instagram’s controls can cover your content. It does not add those controls to the exported file.
Long text can use more than one frame. Review the full set, including the cover and end frame. External embeds, audio, and PDFs are left out.
The frames keep the cover layout that you chose for your story. A portrait cover video is cropped into the photo area of that layout, in the same way as a portrait photo.
Videos become frames only if your account includes video. Pro Plus and above includes video. On Pro, the frames use your photos. If your cover is a video, the frames show its first image.
Download the files
Section titled “Download the files”On a computer, select Download ZIP in the bottom toolbar. Open the ZIP to get the numbered files. Photos export as images; video frames use video files.
On a supported phone, use the save controls to open the device’s share sheet. Choose the save action for your photo library. Browser support can change which save options you see.
Send to yourself or others
Section titled “Send to yourself or others”- Select Send to yourself or others.
- Keep the page open while the files upload.
- Select Copy Link when the upload finishes.
- Send the link to another person, or scan the QR code with your phone. Exposure also emails the link to your account email address. If the email does not go out, the window tells you to use the link or the QR code.
Anyone with this link can access the files for seven days. The recipient does not need to sign in. A new send replaces the previous frame link. A Reel has its own separate link. You can send up to 10 times each hour.
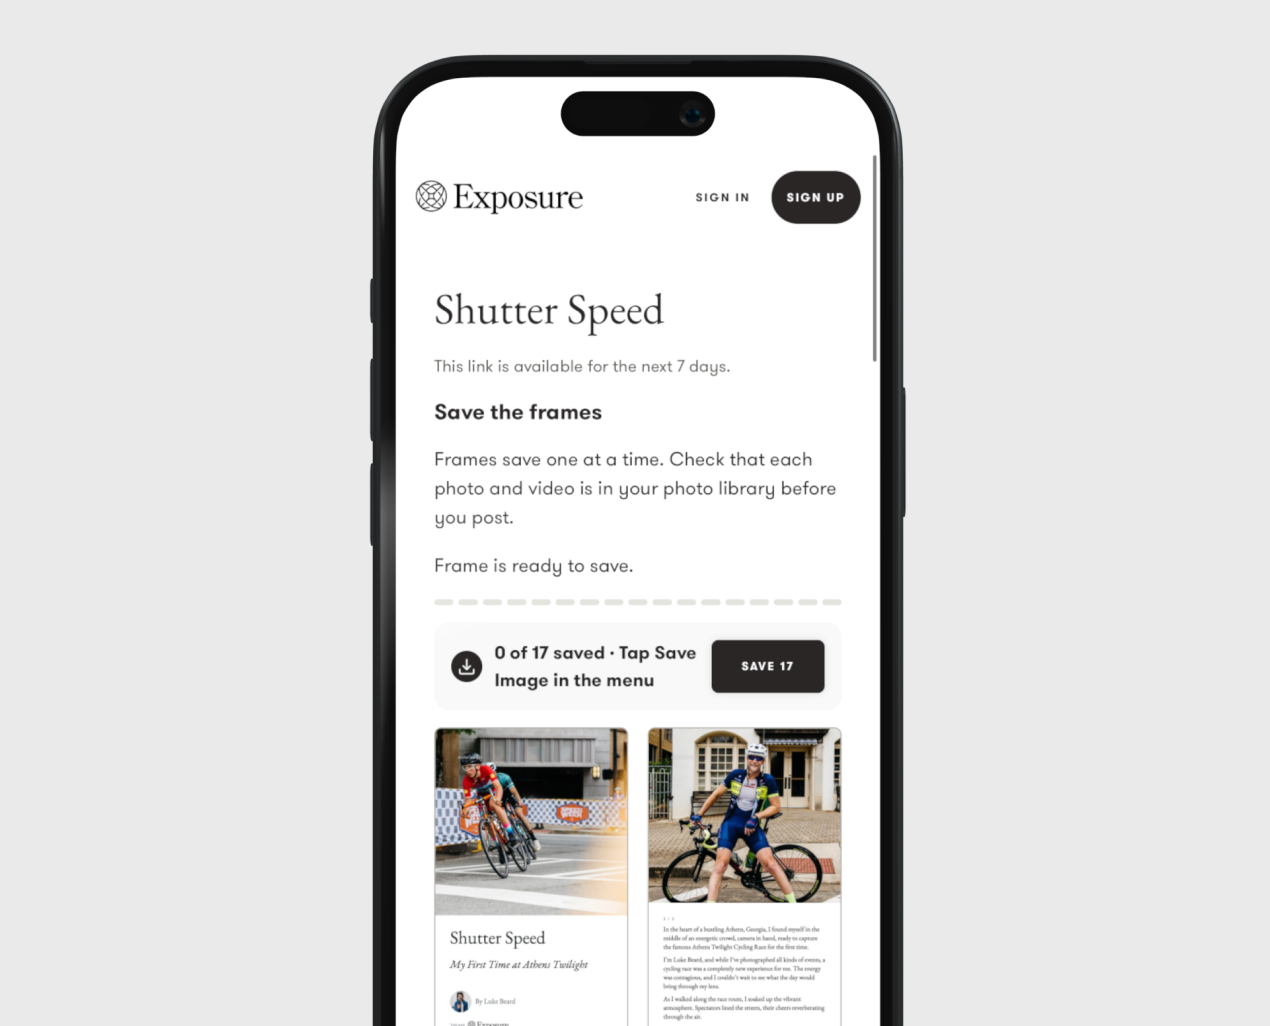
The shared page saves the frames one at a time. The large button saves the next frame, and the text above it counts the frames that you saved. Start at the top of the page and keep selecting that button until it shows All frames saved.
The page starts with the last frame and moves to the first. This order puts the frames in your photo library in the sequence that you post them.
What the button does depends on your browser:
- On a phone or tablet that can share files, the button shows Save. Your phone opens its menu, where you tap Save Image.
- On an iPhone browser that cannot share files, the button shows Show. Press and hold the frame, then tap Save to Photos.
- On a computer, the button shows Download and saves the file.
If a frame is still loading, wait and select it again. Check your photo library before posting.
If the frames are not ready
Section titled “If the frames are not ready”Keep the export tab open. Return to it if preparation pauses. If a frame does not load, select it to try again. If a send fails, select Retry send. Password-protected stories or sites, gallery stories, and right-to-left stories cannot use this export.
Need help?
Section titled “Need help?”Use the Exposure contact form.